
Last week on Clayshare Live with Michael Harbridge he showed how to make giant ornaments. I had to make some right away. I made 3 sizes and I love how they came out.

I actually have 3 more in process that I want to make slightly different so they'll look like they're on their side.
For a while my glazing setup has been a little workbench in the garage next to my kiln. When we moved the kiln into the garage Craig moved out. He built the workbench, but now he's moved to the basement and expanded. The workbench is maybe 3 feet long or so. Before that I had always glazed at a studio so I didn't really know if it was good or bad.
This year has been the first year that I've been actively selling my work at shows. This means I've had to make schedules for myself that I have to keep. Which means that sometimes it's really really hot outside when I need to glaze.
At one point over the summer it was probably 100 degrees in the garage. Craig came out and was like - what is wrong with you. I looked down and I was soaking wet. I was literally covered in sweat. It was gross, very very gross.
The heat wave hadn't broken and I had another kiln load I needed to glaze so I setup my tables in the space between the kitchen and the family room. I put a chair in between them and I can use one table as a staging area and the other as my primary space.
I don't know that I can go back to the small workbench in the garage. Having more space means that I can do more. I can also line things up in an order vs having to put it on the shelf. It helps me keep track of how many coats I have. Temperature controlled so I'm never too hot or too cold. Also GIANT TV to watch while I glaze.

When we move to NY and I design my future studio having a permanent space setup like this is a must.
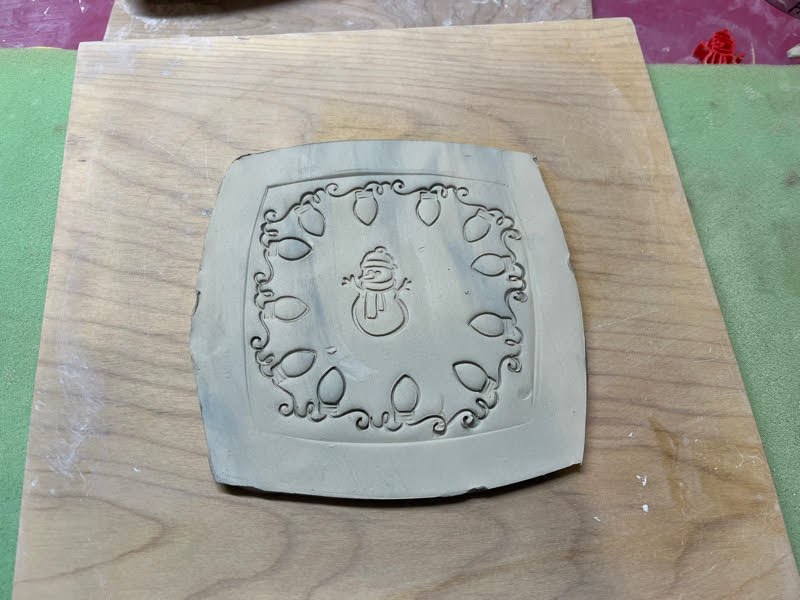
I have one more show this year at the Howard County Holiday Mart on December 3rd. I was really focused on stuff for fall and only have a few weeks to gear up for the Holidays/Winter. I started with a set of these cute little snowmen plates.
I also made a few larger bowls that I will share once I've turned them over that I think will be nice. I'm envisioning a few tree bowls/plates as well.
What I can't decided, this being my first year selling, is how much people will want to buy specifically holiday themed stuff vs stuff that can be used year round.
I love my little turkey plate and bowl. I can't wait to use these for Thanksgiving. They were made from a felt placemat that I got as a set on Amazon. The leaf bowl is from the same set of placemats. I actually had made another turkey plate in bmix a few weeks ago, but after it was all glazed I knocked it off the shelf and smash. I think I like the Laguna 60 one better.
I'm loving how my 2 piece egg tray came out as well. I think I like the platter better than the egg insert. What's interesting is that I used the same patttern underglaze transfer on the last one and I really didn't like that one. I think that maybe it's that there is no white space. I used the same colors on the insert as I did on the tray, but the white space makes all the difference in letting the colors pop.
My gnomes made with the pumpkin cutter came out adorable. I definitely need to make some more of those.
I tried out the combo of 1 coat of Amaco Fog and 2 coats of Glacier on a few snowmen ornaments and I really like how it's turned out.


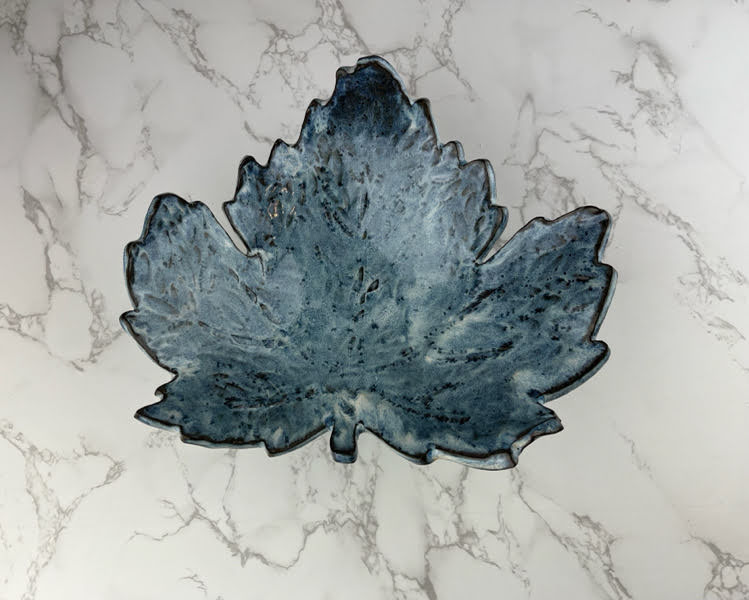


I stayed up late on Halloween loading this kiln. I love how my little turkey bowl came out. Somewhere in the kiln is a matching plate. Definitely using these on the Thanksgiving table this year. I think need to make more next year and have them at shows. There are a whole lot of gnomes in here and I love how whimsical the ones I can see are.
Also in this kiln are a number of mugs I've made for my colleagues.

I'm a little obsessed with cables at the moment. They look amazing and they are actually really easy. You might remember from my Antique Rose Cabled Throw that I learned from this page on BeThinx.
I had 3 skeins of Worsted Tweed American Ewe Yarn from CeCe's Wool in Adella's Olive. I had the 8 oz skeins and used almost every bit of all 3 for this tunic. It's oversized both wide and long to be super comfy for fall and winter.

This pattern uses a 5 mm hook. You're going to cast on in multiples of 10 + 7. I actually cast on and did the first few rows a couple of times before I settled on 67 for my cast on. This gave me a panel that is approximately 22 inches wide. For cables every other row will be single crochet all the way across. The rest of this pattern repeats every 6 rows.
Stitches:
ch - chain
sc - single crochet
hdc - half double crochet
fpdc - front post double crochet
fptc - front post triple crochet

Front and Back Panels (make 2):
Row 1: sc in the second stitch from the hook, sc all the way across
Row 2: ch 1, * sc, sc, fpdc, fpdc, sc, sc, fpdc, fpdc, fpdc, fpdc. Repeat from * until you get to the last 6 stitches. sc, sc, fpdc, fpdc, sc, sc
Row 3: ch 1, sc all the way across
Row 4: ch 1, * sc, sc, fpdc, fpdc, sc, sc, fpdc, fpdc, fpdc, fpdc. Repeat from * until you get to the last 6 stitches. sc, sc, fpdc, fpdc, sc, sc
Row 3: ch 1, sc all the way across
Here comes the fancy cable part
Row 5: ch 1, sc, sc, * fpdc, fpdc, sc, sc, skip the first two fpdc, fptc, fptc. Now behind the two fptc you just did go back to the first stitch you skipped and fptc, fptc in the second stitch you skipped, sc in the stitch next to the first fptc you did, sc. Repeat from * until you get to the last 4 stitches. fpdc, fpdc, sc, sc
Row 6: ch 1, sc all the way across
That's it that's all you need to create these amazing looking cables.
Repeat rows 2-6 until you get your desired length. I repeated this 11 times ending on a non crossover row for a total of 77 rows. I decided that I wanted the seem to line up without the crossover, but you could absolutely end on that if that's your desired look.
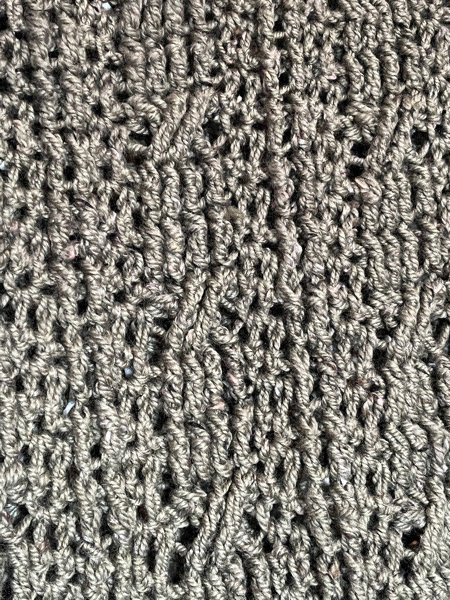
Put the two panels together cable side in and pin. Leave yourself 8 inches for the arm holes and 9.5 for the neck. Sew up the sides and across the top. I decided to start about 2 inches from the bottom, but that's just a stylistic choice.
Next you're going to add the sleeves. I decided that having cables on every row in the sleeves would be far too busy. I also decided I wanted a slightly looser stitch than doing sc for the sleeves so I went with hdc.
I always start in the arm pit with my sleeves to hide the seems and the reductions in rows.
Row 1: ch 2, hdc around the arm picking up 38 stitches, slip stitch to join
Row 2: ch 2, hdc around, slip stitch to join.
Row 3-11: repeat row 2
I find that if I don't do a stitch in the ch stitch that my rows reduce by 1 stitch each round. As you work through rows 2-11 you want to reduce from 38 stitches to 32 stitches for row 12.
Row 12: ch 1, * sc, sc, fpdc, fpdc, sc, sc, fpdc, fpdc, fpdc, fpdc. Repeat from * until you get to the last 2 stitches. sc, sc, slip stitch to join
Row 13: sc all the way around, slip stitch to join
Row 14: ch 1, * sc, sc, fpdc, fpdc, sc, sc, fpdc, fpdc, fpdc, fpdc. Repeat from * until you get to the last 2 stitches. sc, sc, slip stitch to join
Row 15: sc all the way around, slip stitch to join
Row 16:ch 1, * sc, sc, fpdc, fpdc, sc, sc, skip the first two fpdc, fptc, fptc. Now behind the two fptc you just did go back to the first stitch you skipped and fptc, fptc in the second stitch you skipped. Repeat from * until you get to the last 2 stitches. sc, sc, slip stitch to join
Row 17: sc all the way around, slip stitch to join
Row 18-27: ch 2, hdc around, slip stitch to join.
Weave in all your ends.

I actually wanted to make this into a turtleneck, but alas I ran out of yarn so I just did one round around with sc and used the last of the ends that I had.
I'm really pleased with how this turned out and am looking forward for it to be chilly enough to get cozy in this.

I'm already working on my next cabled pattern. I had another skein of this yarn, but in Antique Rose. My original plan was to use it as an accent color, but it just didn't work out where the accent color worked so scarf it is! I'm trying out the Double Cabled Square and I'm loving it.

 Posts
Posts


