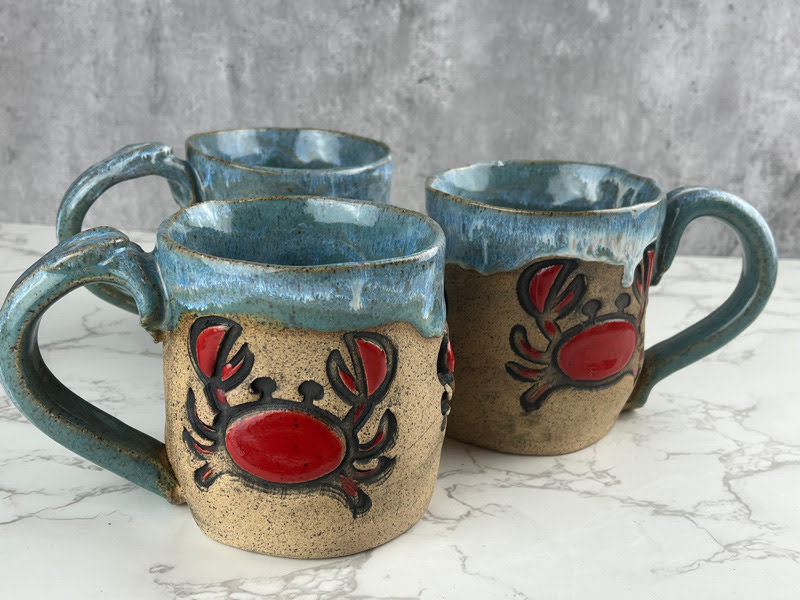
This is the first of 3 Thanksgiving kilns results. Even though the last one is firing post Thanksgiving, since I spent my Thanksgiving weekend glazing these are all Thanksgiving kilns. Here is to hoping that the next two are as good as this one.
Love my leafy gnome. He took a long time to do both in the making and the glazing, but I think it was worth it. The question is do I keep him for me?
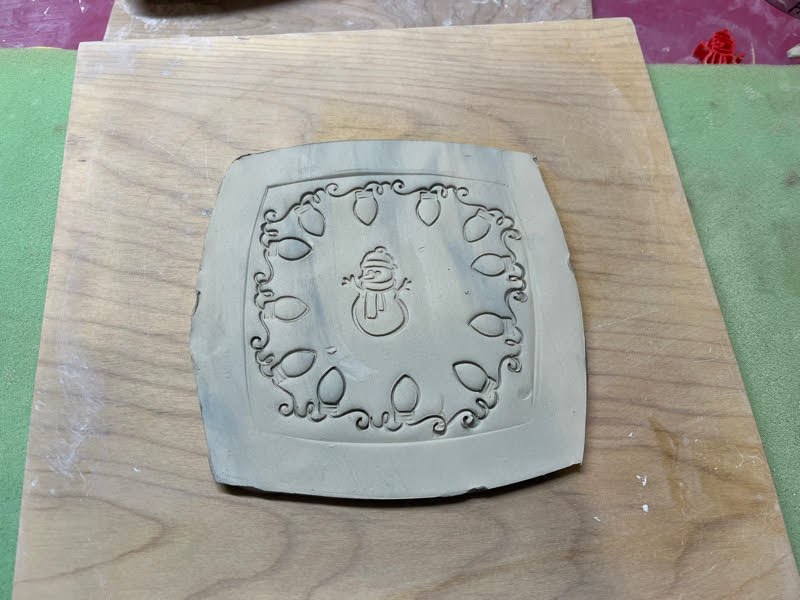
I made a ton of ornaments with my new De La Designs stamp and cutters. I love the gingerbread people, house, and reindeer so very much. I have more coming in the next couple of kilns.
Also loving the snowman and cookies for santa plates.
The one exception to all the awesome is that my pointettia bowl cracked. It's still pretty, but going to be extra fragile with that crack. I think I made the clay too thin and the cut too deep as a v. It was fine in the bisque, but the stress must have been too much.


So originally my plan was to take all of last week off of work and do a ton of pottery stuff. I was going to make some things, I was finally going to use my raku kiln, and I was going to glaze to get ready for the Howard County Holiday Mart. Work had other things in mind for me. I ended up getting to take off half a day on Wednesday, but then I ended up working Sunday evening to get ready for a workshop. C'est la vie.
However, since I got Friendsgiving out of the way the Saturday before Thanksgiving that left me with enough time to glaze and get ready for the show. I had a ton of holiday stuff that ended up filling 2 kilns with a bit spilling over into a third. The second is cooling now (pictures to come later this week) and my plan is to unload and fire the third tonight. The third kiln will have some other things I had on my shelves waiting to be fired that aren't holiday (elephant ears!), but there was enough that didn't fit in that I wanted to fire again even if it's not packed as tightly as normal.
As this is the first year I've been selling this is the first time I've done a holiday show. I don't quite know what to expect. How much are people looking for holiday specific things or just gifts for others. Packing for it later this week will be interesting.

A while back I ended up with a Tunisian crochet hook. It's been in my bag of hooks for probably a year. A few weeks ago I decided - that's it I'm going to learn how to do this thing. I had some leftover light purple yarn that looked about the right weight for my 6mm Tunisian crochet hook. It's leftover first from a sweater I made myself and then from a matching sweater I made River.
I remembered that Heart Hook Home had done a bunch of Tunisian crochet and I started with the Simple Crochet tutorial. The key to Tunisian crochet is that on one row you pick up all the stitches onto you're hook and then in the reverse row you get them all off your hook until you're back to one. I did maybe 12 inches of the simple tunisian crochet and I found that it was curling like made. As I did some research I found that this is actually perfectly normal for this stitch. This is actually one of the things that I didn't like about some knitting stitches. I frogged everything.
I then then found the Heavenly Hyggee Hat Pattern and learned the knit and the purl stitches. A few things that I realized. First - OMG does the knit and purl look like it's actually knitting and not crochet. It makes sense given how you do it, but I was expecting it to be quite so similar. Second, when I was doing the simple stitch I kept dropping stitches, but by doing a pattern of 2 knit and 2 purl for the hat, I never dropped stitches. Third, as fast as I am at crochet from lots of practice, I am slow at this. A crochet hat would probably take me 1-2 hours. This took me way way more than that. Fourth, a big part of the problem was that I would be doing this while on zoom calls. Then I would loose track of whether I was in the forward row or the back row. Lots o' frogging!

I do not know exactly what yarn this is, but it is a worsted weight yarn. For the hat I cast on 62 stitches and made it about 80 rows. Then I stitched up the side and closed the top. Later once I had finished the scarf I added 6 rows around the bottom with the multi-colored yarn and then added the pom at the top.

For the scarf I cast on 26 stiches and I used all the light purple yarn I had left which gave me 158 rows. It was not long enough for a scarf so I searched out a yarn that ws the same weight and matched the color. I am not certain what this yarn is, but I'm fairly certain it's 4th of July from Briar Rose Fibers. It is possible the light purple is the same, but I can't be sure.
I changed colors on the side and went until I thought it would be the right length which was 94 rows. Then I flipped it over picked up my 24 stitches and continued on. The join is barely noticeable. If it isn't obvious I did 94 rows on this side too. I think it could do wiht a big of blocking, but overall I'm really please with how the set turned out.

This being a holiday week this will likely be my last post until next Monday. We'll see, maybe a kiln sneak peak over the weekend depending on how the timing works out. Happy Thanksgiving!
A few weeks ago someone turned me onto Shein. This was both great and expensive. I immediately bought $40 worth of placemats. The one that made this bowl was described as a placemat, but I have no idea how you'd use it as one in real life. It's really 3D, a bowl or plate would not lay flat on it.
However, it makes amazing pottery texture I draped this over my wok mold and added a foot. I'm really excited to see the finished product.

Everything I make with cardinals and birches flies off the shelf. I decided to try to make some larger items and see if those sell as I've noticed I don't sell nearly as many large platters as I do small plates. I really like how this platter turned out. The rim template is a cutter from De La Designs.

A few years ago I planted a Thai basil plant in my front yard, or maybe it was in a pot. The origin was 1 plant, but now every year it grows on it's own. Multiple Thai basil plants grow to small bushes.
We've been having this summer like fall so it's grown even bigger this year. This weekend was the last of the warm weather (it's November) so I went and snipped all the basil to make pesto.
So.
Much.
Basil.

I made pesto for about 3 hours. Pesto is pretty simple to make...basil, nuts (pine, walnut, pecan), olive oil, parmesan. The time consuming part is taking all the leaves off the basil stems. Once you have a pile of basil put it into the food processor. I wait until I have about 3-4 cups worth. Turn the processor on and then through the little tunnel add a couple of tablespoons of olive oil. Then add in your nuts and cheese. Scrape down the sides and add more oil if needed.
I freeze the pesto in my canning jars.
Next year I'm going to start making holiday stuff in July. I'm frantically making a bunch now for my final show of the year. This adorable set is made with stamps from De La Designs and Gifts. These are in Laguna 60, but I'm also making a few more in B-Mix. I ordered more Laguna 60, but it hasn't been shipped yet so I'm down to my last 50 pounds.

I'm getting ready for my last show of the year coming up on December 3rd making wintery items. The show is the Howard County Holiday Mart. Tickets are available online for $5, but if you use the code HOLIDAY50 you get $1 so tickets are only $4. While this is my first year at the show, this is the 50th year for the Holiday Mart and I'm really excited for it. Hope to see you there!

Both of these bowls were made with winter themed placemats. The one above is a poinsettia and the one below a snowflake. Both were made with a slab, the texture rolled in and then I used a needle tool to cut around the placemat to create the edging. The slabs were then draped over a mold. For the poinsettia I used a large one I made myself from the inside of a wok. The snowflake was one of Michael Harbridge's puzzling molds. Both got rather large foot rims so that they'd look elegant off the table.
I feel like the poinsettia has to be red, but what color for the snowflake?

Several pieces of mine will be at the Harford Artists Association Gallery in Bel Air, MD in their Wonders of Winter gallery exhibit through January 8th. The opening reception is November 12th from 1-4. I feel so fancy having my work in a gallery even if it is just a quaint little one near home.
When I dropped everything off the gallery was in a state of flux as all the walls were bare and they were bringing in all the work for the new exhibit. I can't wait to see everything displayed. If you're local it's definitely worth dropping by to see during the opening or just during their normal hours. They are located just behind the Bel Air Armory.

Last week on Clayshare Live with Michael Harbridge he showed how to make giant ornaments. I had to make some right away. I made 3 sizes and I love how they came out.

I actually have 3 more in process that I want to make slightly different so they'll look like they're on their side.
For a while my glazing setup has been a little workbench in the garage next to my kiln. When we moved the kiln into the garage Craig moved out. He built the workbench, but now he's moved to the basement and expanded. The workbench is maybe 3 feet long or so. Before that I had always glazed at a studio so I didn't really know if it was good or bad.
This year has been the first year that I've been actively selling my work at shows. This means I've had to make schedules for myself that I have to keep. Which means that sometimes it's really really hot outside when I need to glaze.
At one point over the summer it was probably 100 degrees in the garage. Craig came out and was like - what is wrong with you. I looked down and I was soaking wet. I was literally covered in sweat. It was gross, very very gross.
The heat wave hadn't broken and I had another kiln load I needed to glaze so I setup my tables in the space between the kitchen and the family room. I put a chair in between them and I can use one table as a staging area and the other as my primary space.
I don't know that I can go back to the small workbench in the garage. Having more space means that I can do more. I can also line things up in an order vs having to put it on the shelf. It helps me keep track of how many coats I have. Temperature controlled so I'm never too hot or too cold. Also GIANT TV to watch while I glaze.

When we move to NY and I design my future studio having a permanent space setup like this is a must.
I have one more show this year at the Howard County Holiday Mart on December 3rd. I was really focused on stuff for fall and only have a few weeks to gear up for the Holidays/Winter. I started with a set of these cute little snowmen plates.
I also made a few larger bowls that I will share once I've turned them over that I think will be nice. I'm envisioning a few tree bowls/plates as well.
What I can't decided, this being my first year selling, is how much people will want to buy specifically holiday themed stuff vs stuff that can be used year round.
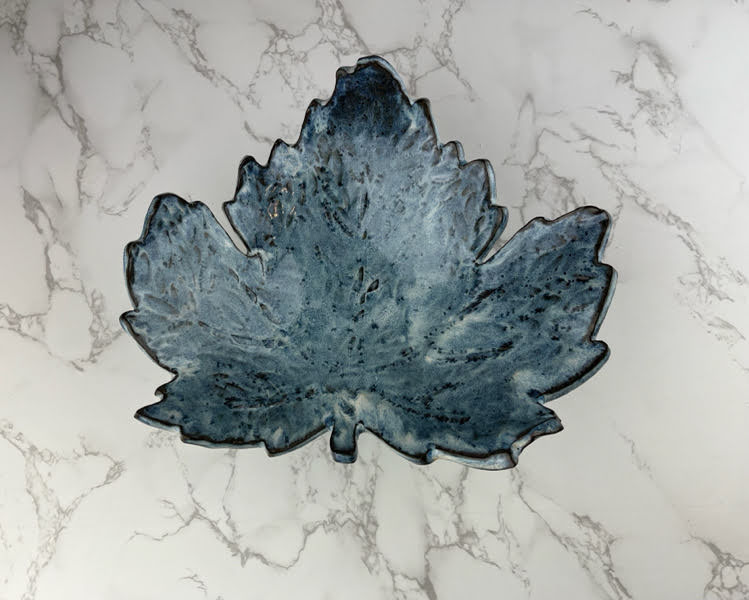
I love my little turkey plate and bowl. I can't wait to use these for Thanksgiving. They were made from a felt placemat that I got as a set on Amazon. The leaf bowl is from the same set of placemats. I actually had made another turkey plate in bmix a few weeks ago, but after it was all glazed I knocked it off the shelf and smash. I think I like the Laguna 60 one better.
I'm loving how my 2 piece egg tray came out as well. I think I like the platter better than the egg insert. What's interesting is that I used the same patttern underglaze transfer on the last one and I really didn't like that one. I think that maybe it's that there is no white space. I used the same colors on the insert as I did on the tray, but the white space makes all the difference in letting the colors pop.
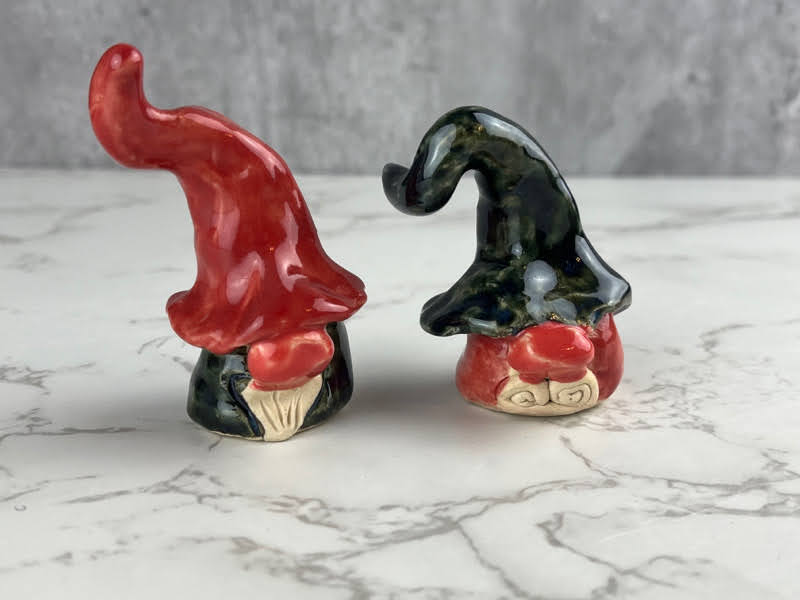
My gnomes made with the pumpkin cutter came out adorable. I definitely need to make some more of those.
I tried out the combo of 1 coat of Amaco Fog and 2 coats of Glacier on a few snowmen ornaments and I really like how it's turned out.