
Magic Metallics Coper Patina
June 17, 2023I've been wanting to play with the Mayco Magic Metallics for a while. There are several of them, but the copper one in particular called to me. When I was at the workshop last month with Michael Harbridge I bought the copper and the copper patina. I made a few mistakes that I would change next time, but I'm supper happy with the results.

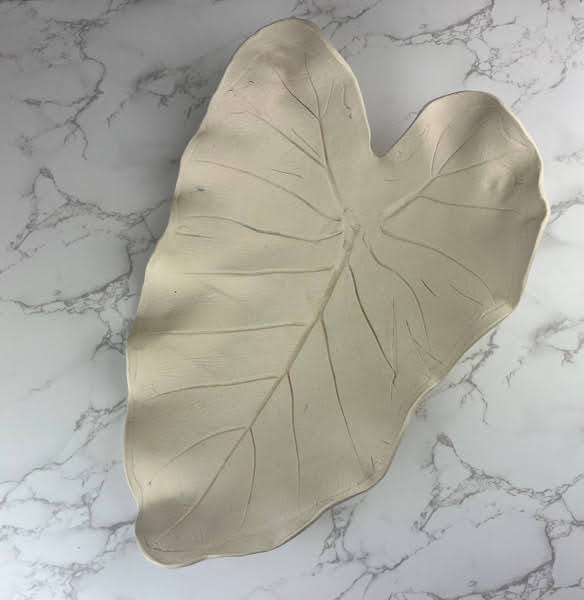
Above is the finished elephant ear and below is what it looked like after the glaze firing. I knew I was going to use this technique on it and so I just left it unglazed.
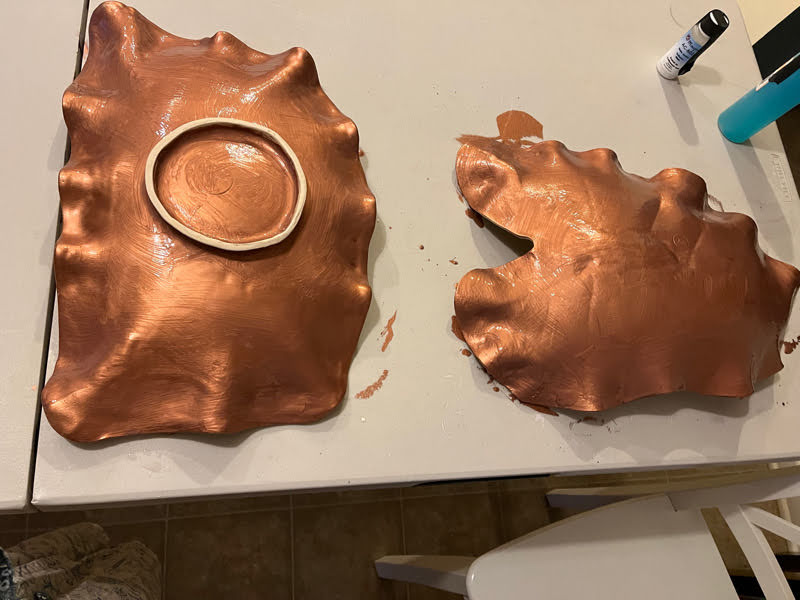
I also had this bee plate which just didn't turn out well at all. Michael had mentioned you can use this on a badly glazed piece. The only difference is that it takes longer for things to dry. You can use this technique on bisque or glaze fired pieces, but of course glaze fired pieces are going to be stronger over time since they're vitrified.

I wiped both pieces down and then added 3 coats of the copper on the back with a fan brush. I started on the back since it will be less likely that it will be seen if I messed up. I also determined that I didn't need 3 coats.
For the front I only did 2 coats after the learning I had on the back.

With only 2 coats on I could still see the veining of the elephant ear which I really wanted.

Once that was mostly dry I added in the patina. You can see the patina start to work immediately, but it will develop over time.

The patina pooled in the middle and I read after the fact that I should have wiped that with a sponge - lesson number 1 for next time.

It was really cool to watch the patina develop.

I let these dry overnight, but lesson #2 is to put the sealer on sooner as the patina will keep going until you seal it. I used Mayco's gloss sealer. Depending on the look you're going for, you could also use the matte.

Looking at the finished bee you can see where lesson #2 really came into play. I let the patina go so long it ate through and you can start to see the yellow glaze. In this instance it works, but I could also have added more copper and patina to fix if I wanted.

I'm really happy with both of these and now just need to find a spot in my garden for them


0 comments